
Lash Lift Kit Instructions: A Comprehensive Guide

Discover the secrets to achieving a professional lash lift at home! This guide details each step, from preparation to aftercare, utilizing kits like PERMANIA.
Enhance your natural lashes with a curled, lifted look, mirroring salon results.
Understanding the Lash Lift Procedure
A lash lift is a semi-permanent treatment that curls and lifts your natural eyelashes, creating the appearance of longer, fuller lashes without the need for extensions. Unlike traditional perms, lash lifts focus on enhancing your existing lashes rather than altering their structure drastically. The procedure involves several carefully timed applications of lotions that break down and reshape the disulfide bonds in your hair, allowing them to be molded into a curled position.

The process typically begins with cleansing the lashes and applying a silicone shield or rod to the eyelids, providing a surface for the lashes to be lifted against. A lifting lotion is then applied to break down the lash structure, followed by a setting lotion to rebuild and fix the new curl shape. Proper timing is crucial; over-processing can damage lashes, while under-processing won’t deliver the desired lift.
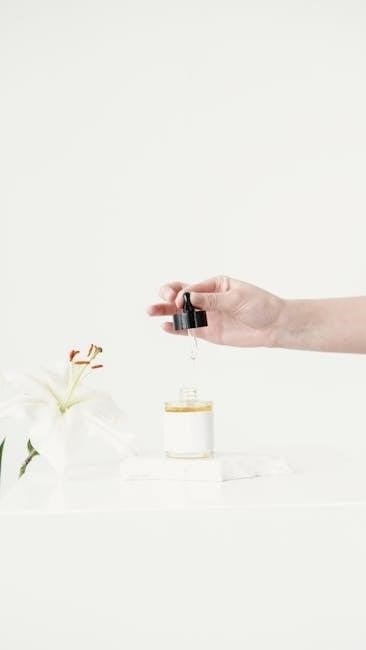
Kits, such as the PERMANIA Lash Lift Kit, offer a convenient way to achieve this at home, providing separate steps and products for a salon-quality result. Understanding each step and adhering to the recommended processing times are key to a successful and safe lash lift.
What is Included in a Typical Lash Lift Kit?
A comprehensive lash lift kit, like the PERMANIA Lash Lift Kit, generally contains everything needed for multiple treatments. Essential components include several sachets (often 10) of lifting lotion, designed to break down the lash’s structure for reshaping. Similarly, you’ll find setting lotion sachets to rebuild and fix the new curl. These are typically 0.8g or 0.03oz per sachet, ensuring precise application.
Crucially, kits include a variety of silicone lash shields or rods in different sizes to accommodate various lash lengths and curl preferences. Adhesive is provided to secure the shield to the eyelid. Other key items are micro brushes or applicators for precise lotion application, cleansing solution to prepare the lashes, and nourishing oil to hydrate post-treatment.
Some kits may also include lifting tools, like a Y-tool, to aid in placement and separation of lashes. Detailed instructions are always included, guiding users through each step. Examining the kit contents before starting ensures you have everything required for a successful lash lift experience.
Preparing for a Lash Lift: Essential Steps
Prior to beginning the lash lift process, thorough preparation is paramount for optimal results and safety. Begin by removing all eye makeup, including mascara and eyeliner, using a gentle, oil-free cleanser. Ensure lashes are completely clean and dry – any residue can hinder lotion effectiveness. Next, carefully inspect the eye area for any signs of irritation, redness, or infection; postpone the lift if present.
Gather all necessary tools and components of your lash lift kit, laying them out in an organized manner. Protect your work surface with a disposable covering. Familiarize yourself with the kit’s instructions, understanding the timing and application techniques. Consider using a mirror positioned for optimal visibility during the procedure.
Ensure you have adequate lighting to clearly see your lashes. Finally, have cotton swabs, a timer, and a comfortable seating arrangement readily available. Proper preparation minimizes errors and contributes to a smoother, more effective lash lift experience, mirroring professional salon standards.
Patch Test: Why It’s Crucial & How to Perform It
A patch test is a non-negotiable step before any lash lift, regardless of kit brand. It identifies potential allergic reactions or sensitivities to the chemical formulations used in the lifting process. Skipping this step could lead to severe irritation, redness, swelling, or even chemical burns around the delicate eye area.

To perform a patch test, apply a small amount of each lotion – lifting and setting – to a discreet area of skin, such as behind the ear or on the inner forearm. Cover the tested areas with a bandage or medical tape. Wait a full 24-48 hours, carefully monitoring for any adverse reactions like itching, burning, or rash development.
If any irritation occurs, do not proceed with the lash lift. Discontinue use of the kit and consult a medical professional. Even if no reaction is observed, the patch test doesn’t guarantee complete immunity, but significantly reduces the risk. Prioritizing safety ensures a positive lash lift experience.
Step 1: Cleansing the Lashes

The first and arguably most important step is thorough lash cleansing. Remove all traces of makeup, oils, and debris from both the lashes and the surrounding eye area. Utilize a gentle, oil-free cleanser specifically designed for the eyes; avoid harsh chemicals or abrasive scrubs. Oil residue prevents the lifting lotion from effectively adhering to the lashes, compromising the lift’s effectiveness.
Begin by gently washing the eye area with the cleanser, using a soft brush or cotton swabs to reach the base of the lashes. Rinse thoroughly with clean water, ensuring no cleanser remains. Follow with a lash primer, which further degreases and prepares the lashes for the subsequent steps. Allow the lashes to dry completely before proceeding.
A clean canvas is crucial for optimal results. Pay close attention to the inner corners of the eyes, where buildup often accumulates. Proper cleansing maximizes the lifting lotion’s contact with the lashes, leading to a more dramatic and long-lasting curl.
Step 2: Applying Lash Shield/Rod
Carefully select a lash shield or rod that closely matches your eye shape. Kits typically include a variety of sizes to ensure a comfortable and effective fit. Gently apply a small amount of adhesive to the shield’s surface, avoiding excessive use which can cause irritation. Position the shield directly beneath the upper lashes, as close to the lash line as possible, without touching the skin.
Ensure the lashes are neatly aligned and evenly distributed across the shield. Use a micro brush or applicator to gently comb through the lashes, separating any that are stuck together. The goal is to create a uniform curve and maximize contact between the lashes and the shield. Proper placement is vital for achieving a symmetrical and natural-looking lift.
Double-check that all lashes are securely adhered to the shield before moving on. Adjust the shield if necessary, but avoid excessive movement once the adhesive has set. A well-applied shield provides the foundation for a beautiful and long-lasting lash lift.
Step 3: Applying Lifting Lotion
With the lash shield securely in place, it’s time to apply the lifting lotion. Using a micro brush, carefully coat all visible lashes with the lotion, starting from the base and working towards the tips. Avoid getting the lotion on the skin, as this can cause irritation. Ensure every lash is thoroughly saturated for consistent results.
Apply a thin, even layer – excess lotion won’t necessarily improve the lift and could increase the risk of discomfort. Focus on coating the lashes from the root, as this is where the lifting action will occur. Be precise and avoid applying the lotion to the lower lashes. The lifting lotion breaks down the disulfide bonds in the hair, allowing it to reshape.
Once all lashes are coated, gently comb through them again to ensure even distribution. Check for any gaps or missed areas and touch up as needed. Remember, proper application is crucial for a successful and safe lash lift.
Step 4: Processing Time & Monitoring
After applying the lifting lotion, the crucial processing time begins. Typically, this ranges from 8-12 minutes, but always refer to the specific instructions included with your lash lift kit – processing times vary between brands. During this period, it’s vital to closely monitor the lashes for any adverse reactions.
Check the skin around the eyes for redness, swelling, or irritation. If any discomfort arises, immediately remove the lifting lotion with a saline solution. Do not exceed the recommended processing time, as over-processing can damage the lashes. The lotion is actively reshaping the lash structure during this phase.
Gently check the curl formation periodically. You’ll notice the lashes beginning to lift and curl upwards. Avoid disturbing the lashes unnecessarily, but ensure the process is progressing as expected. Consistent monitoring is key to achieving optimal results and maintaining lash health.
Step 5: Removing Lifting Lotion
Once the processing time is complete, it’s essential to thoroughly remove the lifting lotion. Using a clean, dry micro-brush or cotton swab, gently wipe away the lotion from both eyes. Avoid getting any lotion in the eyes; if contact occurs, rinse immediately with copious amounts of saline solution.
Ensure all traces of the lifting lotion are removed, as any residue can cause irritation or affect the final result. A gentle, circular motion is effective for removal, working from the base of the lashes towards the tips. Pay close attention to the inner and outer corners of the eyes, where lotion may accumulate.
After removing the bulk of the lotion, use a damp cotton pad to gently cleanse the lash line and surrounding skin. This ensures complete removal and prepares the lashes for the next step – the application of the setting lotion. Proper removal is crucial for a safe and effective lash lift.
Step 6: Applying Setting Lotion
Following the complete removal of the lifting lotion, it’s time to apply the setting lotion. This crucial step locks in the newly created curl and ensures a long-lasting lift. Using a clean micro-brush, carefully apply the setting lotion to the lashes, ensuring complete coverage from base to tip.
Avoid getting the lotion into the eyes; protect the lower lashes with under-eye pads if necessary. Apply a generous, yet even coat, ensuring all lashes are saturated. The setting lotion’s formula is designed to neutralize the lifting lotion and stabilize the lash shape.
Be meticulous during application, as this step directly impacts the final result. Once applied, allow the setting lotion to process for the recommended time, typically around 5-8 minutes, as specified in your kit’s instructions. Monitor closely for any signs of irritation, though this is uncommon.
Step 7: Removing Setting Lotion
After the processing time is complete, it’s vital to thoroughly remove the setting lotion. Utilize a clean, dry micro-brush or a sterile cotton swab dampened with water to gently wipe away the lotion from the lashes. Ensure all residue is removed, as any remaining product could cause irritation or affect the longevity of the lift.
Work systematically, starting from the base of the lashes and moving towards the tips. Be gentle to avoid any unnecessary pulling or tugging. Inspect the lashes carefully to confirm complete removal; repeat the process if needed. A clean, lint-free applicator is essential for a thorough cleanse.
Once the setting lotion is fully removed, gently separate the lashes with a spoolie brush. This prevents clumping and allows you to assess the lift’s shape and curl. Observe for any unevenness or areas needing slight adjustment. The removal process is as important as the application itself for optimal results.
Step 8: Nourishing the Lashes
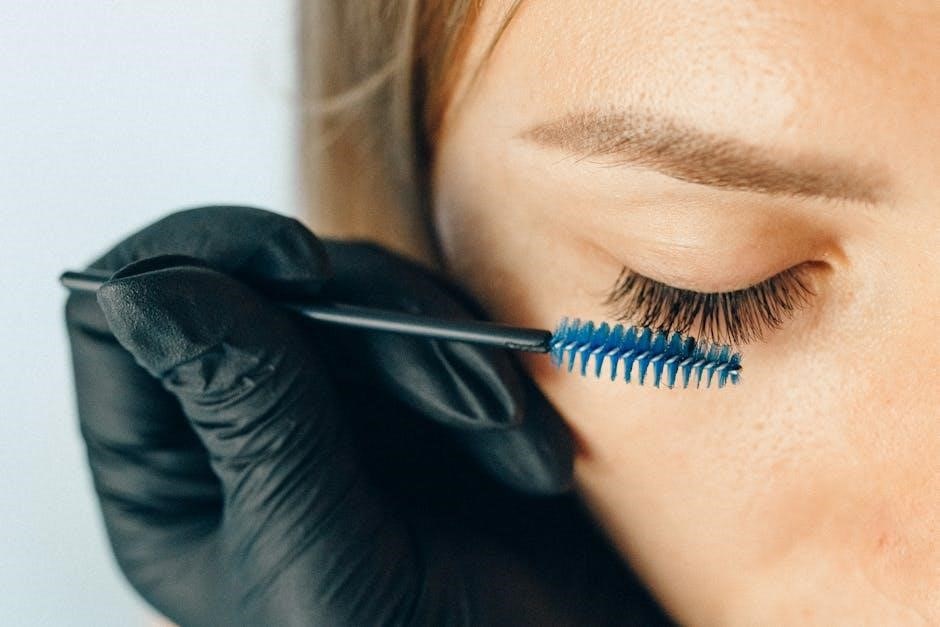
Following the removal of the setting lotion, replenishing moisture and nutrients to the lashes is crucial. Apply a lash-specific nourishing serum or oil – argan, castor, or vitamin E oil are excellent choices. These oils help to hydrate and strengthen the lashes, counteracting any potential dryness from the chemical process.

Using a clean micro-brush or a mascara wand, carefully coat the lashes from base to tip, avoiding direct contact with the eyes. A small amount is sufficient; excess oil can cause blurry vision. Allow the oil to absorb for a few minutes before proceeding with makeup application.
Regular nourishment post-lift is key to maintaining lash health and extending the lift’s duration. Incorporate a lash serum into your nightly routine for optimal results. Consider using a lash conditioner to further protect and hydrate. This final step ensures your lashes remain strong, healthy, and beautifully lifted.
Aftercare Instructions: Maintaining Your Lift
To maximize the longevity of your lash lift, diligent aftercare is essential. Avoid getting your lashes wet for the first 24-48 hours – this includes showering, swimming, and exposure to steam or saunas. Water can compromise the set of the lift, reducing its effectiveness.
Refrain from using oil-based makeup removers or mascaras during this initial period, as oil can break down the lifting solution. Opt for water-based alternatives instead. When applying mascara, choose a lightweight formula and avoid waterproof options, which can be difficult to remove.
Gently brush your lashes daily with a clean spoolie to maintain their shape and prevent clumping. Avoid excessive rubbing or pulling, which can damage the lashes. Nourish your lashes regularly with a lash serum or oil to keep them hydrated and healthy. With proper care, your lash lift can last for 6-8 weeks.
Troubleshooting Common Issues
Uneven Lift: If you experience an uneven lift, it may be due to inconsistent application of the lifting lotion. Ensure thorough coverage of all lashes, particularly those at the outer corners. Re-application in small increments can help correct minor inconsistencies.
Irritation or Redness: Mild irritation is possible, but persistent redness or swelling indicates a potential allergic reaction. Immediately remove the solution and discontinue use. A patch test is crucial to prevent this. Consult a professional if symptoms worsen.
Lash Damage: Over-processing or aggressive handling can cause lash breakage. Strictly adhere to the recommended processing times. Avoid using excessive force when removing the lotion or shield. Proper aftercare, including lash serum, aids recovery.
Lift Not Holding: If the lift doesn’t hold its curl, ensure lashes were clean and free of oils before application. Avoid water and oil-based products for the first 48 hours. Consider a higher-quality kit for better results.
Safety Precautions & Potential Risks
Prioritize safety when performing a lash lift. Always conduct a patch test 48 hours before full application to check for allergic reactions. Avoid getting the lifting or setting lotions in your eyes; flush immediately with water if contact occurs. Never use the kit if you have eye infections, inflammation, or recent eye surgery.
Potential risks include skin irritation, allergic reactions (redness, swelling, itching), and, rarely, temporary vision disturbances. Over-processing can lead to lash damage, breakage, or even permanent lash loss. Improper technique can cause discomfort or uneven results.
Use only as directed, and do not exceed recommended processing times. Keep the kit out of reach of children. If you experience any adverse effects, discontinue use and consult a medical professional. Ensure adequate ventilation during application. Consider professional application if you are unsure or have sensitive eyes.
Choosing the Right Lash Lift Kit

Selecting the ideal lash lift kit requires careful consideration. Look for kits containing all necessary components: cleansing solution, lifting lotion, setting lotion, lash shields/rods, adhesive, and applicators. PERMANIA kits, for example, offer separate steps for professional results. Read reviews and compare brands to assess quality and user satisfaction.
Consider your lash length and curl. Some kits offer a variety of shield sizes to accommodate different lash types. Check the ingredient list for potential allergens. Opt for kits with clear, detailed instructions and, ideally, online tutorial support. Beware of extremely cheap kits, as they may contain low-quality ingredients or be incomplete.
Ensure the kit is specifically designed for lash lifting and not for other purposes. Prioritize kits from reputable brands with good customer service. Evaluate whether you prefer a kit with individual sachets (like PERMANIA) for single-use application or a multi-use formula. Proper selection ensures a safe and effective lift.