A body measurement chart for sewing is a tool used to record precise measurements for creating custom-fit garments․ It ensures accuracy and consistency when drafting patterns․ Using a PDF body measurement chart allows sewists to track changes and maintain a record for future projects․ This essential resource helps achieve professional results in garment construction, making it indispensable for both beginners and experienced sewers alike․
1․1 Importance of Accurate Measurements in Sewing
Accurate body measurements are crucial for achieving a perfect fit in sewing projects․ They ensure garments are tailored to your unique proportions, eliminating the need for costly alterations․ Proper measurements also save time by reducing trial-and-error adjustments․ A well-drafted PDF body measurement chart helps maintain consistency across projects, allowing you to track changes over time․ This precision is essential for both beginners and experienced sewists, ensuring professional-quality results and a flattering, comfortable fit in every creation․
1․2 Overview of Body Measurement Charts
A body measurement chart for sewing is a detailed guide that outlines key measurements needed to create custom-fit garments․ It typically includes dimensions for bust, waist, hips, shoulders, and more․ Available in PDF format, these charts are printable and easy to use․ They often feature diagrams illustrating where to measure, ensuring accuracy․ Charts may cater to different genders and sizes, providing a comprehensive reference for sewists․ This tool is essential for pattern making and tailored clothing, helping to achieve professional results․
1․3 Benefits of Using a PDF Body Measurement Chart
Using a PDF body measurement chart offers numerous advantages for sewists․ It provides a clear, organized way to record and track measurements, ensuring accuracy and consistency․ The printable format allows for easy reference while sewing․ Many charts include diagrams and sections for notes, making them user-friendly․ PDF charts are also easily sharable and can be updated as measurements change․ This tool is indispensable for achieving precise fits and streamlining the sewing process, whether for personal projects or custom orders․

Understanding Body Measurement Charts
Body measurement charts are essential tools for sewing, providing standardized measurements to ensure accurate garment construction․ They guide sewists in understanding key measurements and their applications․
2․1 Standard Body Measurements for Sewing
Standard body measurements for sewing include bust, waist, hips, and body length․ These measurements are crucial for creating well-fitting garments and are typically recorded in a PDF body measurement chart․ The bust measurement is taken around the fullest part, while the waist is measured at the narrowest point․ Hip measurements are usually taken 7-9 inches below the waistline․ Body length measurements, such as from shoulder to hip, ensure proper fit․ Accurate recording of these measurements is essential for successful sewing projects․
2․2 Difference Between Body and Garment Measurements
Body measurements are taken directly from the individual, such as bust, waist, and hip circumference․ Garment measurements, however, are derived from these body measurements with added ease for comfort and movement․ While body measurements are personal and specific, garment measurements are used to create sewing patterns and ensure proper fit․ Understanding this distinction is crucial for achieving well-fitting garments․ A PDF body measurement chart helps bridge the gap by providing a clear guide for translating body measurements into garment measurements accurately․
2․3 How to Read and Interpret a Body Measurement Chart
A body measurement chart for sewing is structured with columns for measurements like bust, waist, and hip․ Each section corresponds to specific body parts, ensuring clarity․ To interpret, locate the relevant measurement and compare it to the chart․ For example, a bust measurement of 38 inches aligns with a specific size․ The chart may include diagrams or labels to guide accurate interpretation․ Always match your measurements to the chart carefully to select the correct size for your sewing project․ This ensures a proper fit and avoids alterations․
Key Measurements Included in a Sewing Chart
A sewing chart includes essential measurements like bust, waist, hip, shoulder, sleeve, arm, neck, crotch, and body length․ These ensure accurate garment construction and proper fit․
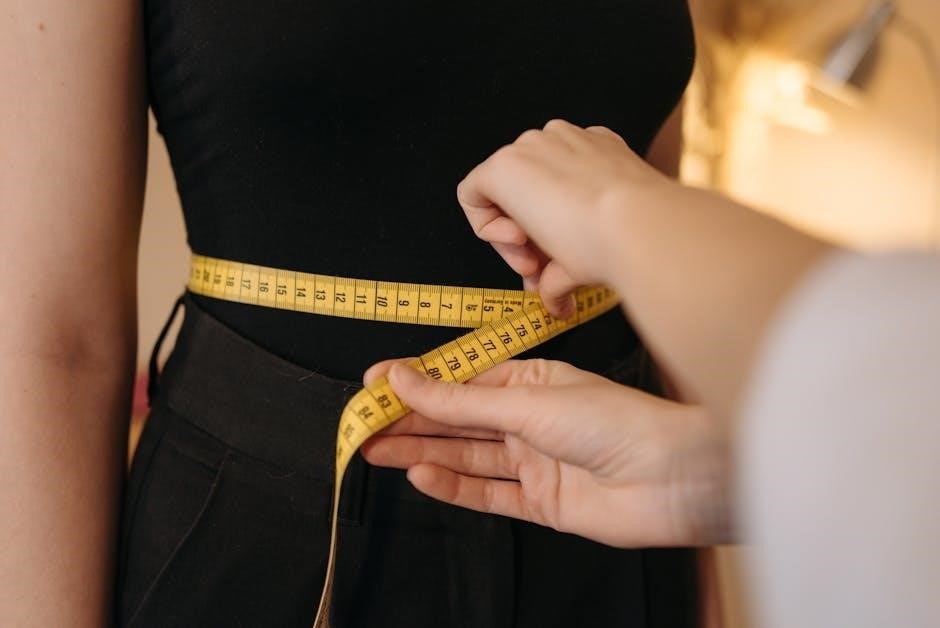
3․1 Bust, Waist, and Hip Measurements
Bust, waist, and hip measurements are fundamental for sewing․ The high bust is taken under the arms, above the bust, while the full bust measures around the fullest part․ The natural waist is the narrowest point of the torso, and the hips are measured 7-9 inches below the waist․ These measurements are crucial for achieving a proper fit in garments like dresses, tops, and pants․ Consistency and accuracy ensure that sewing projects are tailored to your body, making these measurements indispensable for successful sewing․
3․2 Shoulder, Sleeve, and Arm Measurements
Shoulder, sleeve, and arm measurements are vital for garments requiring sleeves․ The shoulder length is measured from the base of the neck to the shoulder tip․ The sleeve length spans from the shoulder to the wrist, while the bicep and forearm circumferences ensure a comfortable fit․ These measurements are essential for sewing shirts, jackets, and dresses, ensuring sleeves are neither too tight nor too loose․ Accurate recording of these dimensions guarantees a polished, professional finish in your sewing projects․
3․3 Neck, Crotch, and Body Length Measurements
Neck, crotch, and body length measurements are crucial for achieving a perfect fit․ The neck measurement is taken around the base, ensuring comfort in collared garments․ The crotch depth is measured from the waistline to the seat, essential for pants and skirts․ Body length measurements, such as from shoulder to hip, help in proportioning garments․ These details are vital for sewing patterns, ensuring garments drape correctly and provide maximum comfort․ Accurate recording of these metrics ensures a tailored, professional finish in all sewing projects․
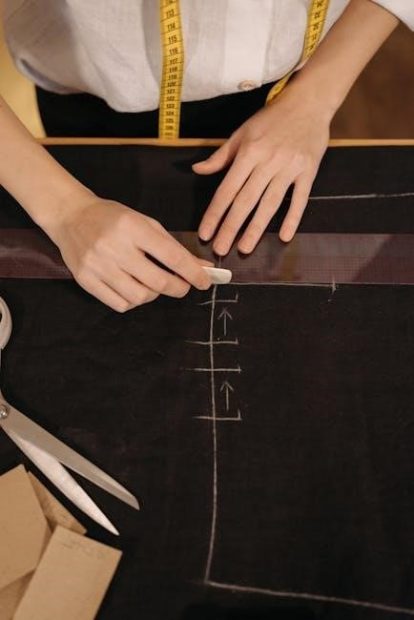
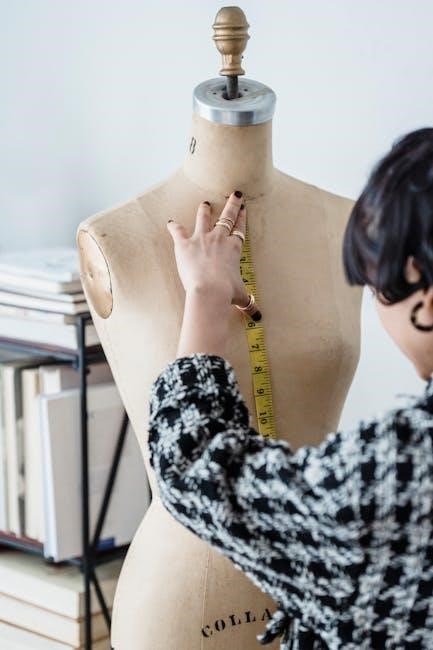
How to Take Body Measurements for Sewing
Use a flexible tape measure, keeping it level and parallel to the floor․ Measure over undergarments or a thin layer of clothing for accuracy and consistency․
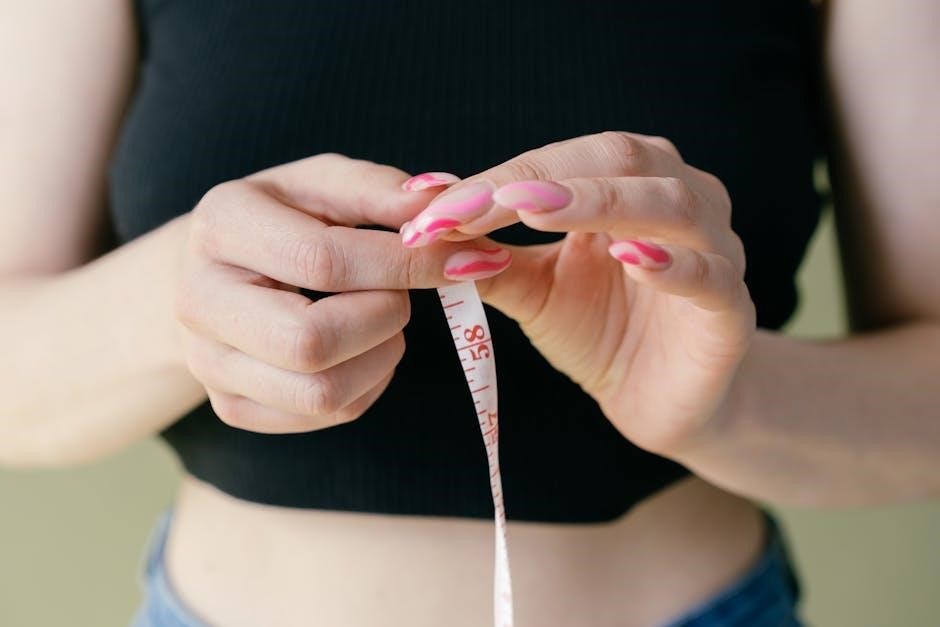
4․1 Essential Tools for Measuring
To accurately take body measurements for sewing, you’ll need a few essential tools․ A flexible tape measure is crucial for obtaining precise circumferences․ A pen or pencil is necessary for recording your measurements․ A full-length mirror helps ensure the tape measure is properly aligned and level; Additionally, having a printable PDF body measurement chart provides a structured format for documenting your measurements, making the process organized and efficient․ These tools collectively ensure accuracy and consistency in your sewing projects․
4․2 Step-by-Step Guide to Taking Measurements
Start by gathering a flexible tape measure and a printable PDF body measurement chart․ Begin with the bust measurement: wrap the tape around the fullest part of your chest, ensuring it’s level and not too tight․ Next, measure your natural waistline, the narrowest part of your torso, usually just above the belly button․ For hip measurements, measure around the widest part of your hips and buttocks, approximately 7-9 inches below your waistline․ For garments requiring additional measurements, such as shirts or pants, measure your shoulders, arm length, neck, inseam, and crotch depth․ Ensure the tape is snug but not restrictive, and consider having a friend assist for accuracy․ Record each measurement on your chart and update periodically to reflect any changes․ Consistency is key to achieving well-fitting garments․
4․3 Tips for Ensuring Accuracy
For precise measurements, use a flexible tape measure and stand upright․ Ensure the tape is snug but not too tight, and avoid slouching․ Measure over the undergarments or clothing you’ll wear with the finished garment․ For consistency, always measure at the same time of day․ If possible, have someone assist you to avoid twisting or bending․ Record measurements immediately to avoid mistakes․ Double-check each measurement for accuracy, and update your chart periodically to reflect any body changes․ This ensures your sewing projects fit perfectly every time․
4․4 Recording Measurements for Future Reference
Accurately recording your measurements ensures consistency in future sewing projects․ Use a dedicated notebook or a digital tool to store your data․ Consider organizing measurements into categories, such as upper body, lower body, and additional details․ Include the date to track changes over time․ For a more structured approach, use a printable PDF body measurement chart and keep it in a safe place․ Regularly updating your records helps maintain accuracy and makes pattern adjustments easier․ This organized approach saves time and ensures your garments always fit perfectly․
Standard Body Measurement Charts for Sewing
Standard body measurement charts provide consistent guidelines for sewing, ensuring accurate garment construction․ They include measurements for men, women, and children, offering a reliable reference for all projects․
5․1 Women’s Body Measurement Chart
A women’s body measurement chart for sewing includes key measurements like bust, waist, hip, and high bust․ It provides standard sizing references, ensuring accurate garment fitting․ The chart is tailored to women’s body types, offering detailed guidelines for various sizes․ Measurements are categorized by misses, petite, and plus sizes, making it versatile․ You can download the chart as a PDF for easy reference․ It helps in creating custom patterns and ensures a perfect fit for all sewing projects, from dresses to trousers․
5․2 Men’s Body Measurement Chart
A men’s body measurement chart for sewing includes essential measurements like chest, waist, hip, neck, sleeve, and inseam․ It provides standard sizing references tailored to men’s body types․ The chart is organized by size categories and includes detailed guidelines for accurate garment construction․ Available as a PDF, it helps sewists create custom-fit patterns for shirts, trousers, and more․ By using this chart, you can ensure precise fits and professional results for all men’s sewing projects, from casual wear to tailored suits;
5․3 Children’s Body Measurement Chart
A children’s body measurement chart for sewing is designed to help create well-fitting garments for kids․ It includes essential measurements like chest, waist, hip, and inseam, tailored to children’s body proportions․ The chart often includes age-based sizing and growth allowances․ Available as a PDF, it’s easy to print and use․ This chart is vital for sewing clothes that fit comfortably as children grow, ensuring accurate results for shirts, pants, and dresses․ It’s a practical tool for parents and sewists alike․
Customizing Your Body Measurement Chart
Customizing your body measurement chart allows for personalizing fit, adjusting measurements, and incorporating additional details․ A PDF chart can be tailored to suit individual sewing needs․
6․1 Adjusting Measurements for Personal Fit
Adjusting measurements for personal fit ensures garments are tailored to your body․ This involves modifying standard charts to reflect individual proportions, such as lengthening sleeves or narrowing shoulders․ By documenting these changes in a PDF body measurement chart, you maintain consistency across projects․ This customization is key for achieving a flattering, professional finish․ Regular updates to the chart help track body changes, ensuring every garment fits perfectly over time․ Accurate adjustments are essential for successful sewing outcomes․
6․2 Incorporating Additional Measurements
Incorporating additional measurements, such as crotch depth, body rise, and high hip, enhances the accuracy of your sewing projects․ These measurements are crucial for garments like trousers, skirts, and fitted dresses․ By adding them to your PDF body measurement chart, you can ensure a better fit․ Use diagrams or notes to clarify where each measurement is taken․ This step is especially useful for custom patterns, allowing you to address specific fitting needs and achieve a more personalized result in your sewing creations․
6․3 Creating a Personalized PDF Chart
Creating a personalized PDF body measurement chart allows you to tailor the document to your specific needs․ Start by selecting a downloadable template that includes essential measurements․ Add your name, date, and any additional notes for clarity․ Customize sections to highlight key measurements or include diagrams for better understanding․ Save the chart as a PDF for easy access and future updates․ This personalized approach ensures your measurements are organized and readily available, making the sewing process more efficient and enjoyable․ Regular updates help track changes over time․

Using a PDF Body Measurement Chart
To create a personalized PDF body measurement chart for sewing, follow these steps:
Find a Template: Search online for free downloadable PDF templates designed for sewing body measurements․
Take Measurements: Use a flexible measuring tape to accurately measure key areas such as the bust, waist, and hips․ Refer to guides or videos for proper placement․
Fill Out the Template: Enter your measurements into the template․ Ensure accuracy and clarity․
Save as PDF: If the template is not already a PDF, save or convert it to PDF format after filling it out․
Personalize: Add personal notes or highlights for frequently used measurements to enhance usability․
Store the Chart: Save the PDF on your computer or print it for physical storage, such as in a binder with sewing patterns․
Update Regularly: Periodically review and update your measurements to reflect any changes․
By following these steps, you can create a tailored PDF body measurement chart that streamlines your sewing process and ensures well-fitting garments․
7․1 Downloading and Printing the Chart
Downloading and printing a PDF body measurement chart is a straightforward process․ Start by searching for free or premium templates online, ensuring they are specifically designed for sewing․ Once downloaded, open the PDF using Adobe Acrobat or similar software․ Print the chart on standard letter-sized paper to maintain clarity․ Before use, verify the print size by measuring a 1-inch scale provided on the chart․ This ensures accuracy when recording measurements․ Print multiple copies if needed for future updates or projects․
7․2 Filling Out the Chart Accurately
To fill out the chart accurately, start by gathering a flexible tape measure and a pen․ Take each measurement carefully, following the guidelines provided on the chart․ Record each measurement in the corresponding section, ensuring clarity and legibility․ Double-check your measurements to avoid errors․ For accuracy, measure in front of a mirror or ask someone to assist․ Note the date and any specific conditions, such as posture or clothing worn, to ensure consistency․ This step is crucial for achieving precise fits in your sewing projects․
7․3 Storing and Updating the Chart
Store your completed body measurement chart in a safe, accessible location, such as a sewing folder or digital file․ For digital versions, save the PDF to a designated folder on your computer or cloud storage․ Update the chart every 6-12 months or when significant body changes occur․ Include notes about the date and any circumstances that may have affected measurements․ Regularly reviewing and updating ensures your records remain accurate and reliable for future sewing projects․ This practice helps maintain consistency and precision in garment creation․
Common Mistakes to Avoid When Measuring
Common mistakes include using tools incorrectly, not accounting for body position, and ignoring consistency․ These errors can lead to ill-fitting garments, emphasizing the importance of accurate techniques for successful sewing projects․
8․1 Incorrect Use of Measuring Tools
One of the most common mistakes is using measuring tools improperly․ For instance, using a rigid ruler instead of a flexible tape measure can lead to inaccurate results․ Additionally, failing to maintain consistent tension while measuring can cause discrepancies․ Many people also make the error of measuring over clothing, which can add unwanted bulk․ Incorrect alignment, such as not keeping the tape measure level or straight, can distort measurements․ These errors can result in garments that are too tight or too loose, emphasizing the importance of proper tool usage for precise fits․

8․2 Not Accounting for Body Position
Not accounting for body position is a common mistake that leads to inaccurate measurements․ Standing posture, slouching, or holding breath can significantly alter results․ For example, a slouched position may increase back measurements, while holding breath can temporarily inflate chest measurements․ To ensure accuracy, measurements should be taken in a natural, relaxed stance with the body in a neutral position․ This avoids distortions and provides consistent results․ Always instruct the person being measured to stand comfortably upright and breathe naturally during the process for reliable data․
8․3 Ignoring the Importance of Consistency
Consistency is crucial when taking body measurements for sewing․ Inconsistent methods, such as varying the tightness of the tape measure or the time of day measurements are taken, can lead to inaccurate results․ For example, measuring in the morning versus evening may yield different numbers due to natural body changes․ To ensure reliability, always use the same technique, tool, and conditions․ Inconsistency can result in poorly fitting garments and make tracking changes over time difficult․ Establishing a routine and adhering to it guarantees more precise and useful measurements for sewing projects․
Using a body measurement chart for sewing ensures accurate fits and simplifies garment creation․ Regularly updating your measurements in a PDF chart helps track changes and enhances sewing success․
9․1 Summary of Key Points
Accurate body measurements are crucial for sewing well-fitting garments․ A PDF body measurement chart provides a structured way to record and track measurements, ensuring consistency and precision․ It includes essential metrics like bust, waist, hip, and more, tailored for different genders and sizes․ Regular updates help monitor changes, while customizable options cater to individual needs․ This tool simplifies pattern drafting and enhances sewing outcomes, making it an indispensable resource for sewists seeking professional results and a perfect fit every time․
9․2 Encouragement to Use the Chart for Sewing Success
Embrace the simplicity and precision of a body measurement chart for sewing success․ By regularly using this tool, you’ll achieve a perfect fit, reduce alterations, and enhance your sewing confidence․ Whether you’re a beginner or an experienced sewist, this chart streamlines the process of understanding your body measurements․ Encourage yourself to update it periodically and use it as a reliable reference for all your sewing projects․ It’s a small step that leads to big improvements in your garment-making journey!