
A carport is a versatile structure providing shelter for vehicles, offering protection from weather elements while enhancing property value. This guide outlines the steps for successful installation, ensuring durability and functionality, tailored for homeowners seeking to add practical outdoor storage space efficiently.
1.1 What is a Carport?
A carport is an open or partially enclosed structure designed to provide shelter for vehicles, offering protection from weather conditions like rain, snow, and sunlight. Unlike garages, carports are typically simpler in design, with a roof supported by posts or beams, and may or may not include walls. They are often preferred for their cost-effectiveness, ease of installation, and versatility in design. Carports can be freestanding or attached to a building, making them a practical solution for homeowners with limited space or those seeking additional storage options. Their open design allows for airflow and easy access, while still safeguarding vehicles and outdoor equipment from the elements. Carports are also customizable, catering to various needs and architectural styles.
1.2 Benefits of Installing a Carport
Installing a carport offers numerous advantages, including enhanced protection for vehicles from harsh weather conditions such as rain, snow, and UV exposure. It provides a cost-effective alternative to garages, requiring less material and labor for construction. Carports also increase property value by adding functional outdoor space that can double as storage for equipment or shelter for outdoor activities. Their open design promotes airflow, reducing moisture buildup and potential damage to vehicles. Additionally, carports are customizable to match various architectural styles, ensuring they blend seamlessly with existing structures. Their ease of installation and versatility make them a practical solution for homeowners seeking to maximize space and protect their investments efficiently.
Planning and Preparation
Begin by assessing the space and determining the carport’s size, ensuring it fits your vehicle and yard layout. Use tools to measure accurately and plan the structure’s placement, considering sunlight and drainage. Gather all necessary materials and tools beforehand to streamline the installation process, ensuring everything is within reach when needed;
2.1 Tools and Materials Needed
Installing a carport requires specific tools and materials to ensure a successful and durable structure. Essential tools include a drill, impact wrench, hammer, tape measure, level, and safety gear like gloves and goggles. Materials needed are posts, beams, rafters, roofing panels, concrete footings, screws, nails, and flashing. Additionally, weather-resistant wood or metal framing is necessary for the structure, along with sealing compounds to protect against moisture. Make sure to have sand or gravel for base leveling and a wheelbarrow for mixing concrete. Organizing these tools and materials beforehand will streamline the installation process and prevent delays. Always check the manufacturer’s instructions for specific requirements tailored to your carport kit.
2.2 Local Building Codes and Permits
Before starting your carport installation, it is crucial to comply with local building codes and regulations. These codes ensure safety and structural integrity, so check with your local government to determine specific requirements. Obtain necessary permits, as failure to do so may result in fines or project halts. Ensure your carport design meets size, height, and setback restrictions. If your project includes electrical or plumbing work, additional permits may be required. Inspections by local authorities are typically needed to verify compliance. Adhering to these regulations guarantees a lawful and safe installation process, avoiding potential legal issues down the line; Always consult local officials if unsure about specific requirements for your area.

Site Preparation
Site preparation involves clearing the area, leveling the ground, and marking the perimeter for your carport. Ensure the land is stable and free from debris to create a solid base for installation.
3.1 Measuring and Marking the Site
Start by measuring the area where the carport will be installed. Use a tape measure to ensure accurate dimensions, marking the corners with stakes and string. Check for levelness and adjust as needed to ensure the site is even. Proper measurement and marking are crucial for aligning posts and beams correctly. Once satisfied with the layout, use spray paint to mark the perimeter and center lines. Double-check all measurements to prevent errors during installation. This step ensures your carport is built on a precise and level foundation, which is essential for stability and longevity;
3.2 Clearing the Land and Leveling
Clear the site of debris, vegetation, and obstructions to create a clean workspace. Remove any trees, shrubs, or rocks that interfere with the carport’s footprint. Once cleared, assess the ground’s levelness using a spirit level or laser level. If uneven, dig or fill areas as needed to achieve a flat surface. Use a rake or shovel to smooth the ground, ensuring it is firm and stable. For precise leveling, mark the highest and lowest points and adjust the soil accordingly. Proper clearing and leveling ensure a solid foundation for your carport, preventing structural issues and ensuring even weight distribution. This step is critical for the stability and longevity of the structure.
Foundations
A strong foundation is essential for a carport’s stability and durability. It ensures the structure can bear weight and withstand environmental conditions, providing a secure base for the entire build.
4.1 Types of Foundations for Carports
Carports can be built on various foundation types, each offering different levels of stability and durability. Concrete footings are the most common, providing a solid base for posts. A full concrete slab foundation is ideal for larger structures or uneven terrain. For simpler setups, a gravel base can suffice, offering drainage and stability. Pier-and-beam foundations are another option, especially for sloped sites. Each type has its advantages, and the choice depends on the carport’s size, local building codes, and soil conditions. Properly preparing the foundation ensures the carport remains secure and level, preventing future structural issues. Always consult local building codes to determine the most suitable foundation for your project.
4.2 Pouring Concrete Footings
Pouring concrete footings is a critical step in carport installation, ensuring a sturdy base for the structure. Begin by measuring and marking the site according to your carport’s dimensions. Dig holes for the footings, typically 12 inches deep and 18 inches wide, depending on local building codes. Line the holes with wooden forms and reinforce with steel rebar for added strength. Mix and pour the concrete, filling the forms to the top. Use a level to ensure the surface is even and smooth out any air pockets with a trowel. Allow the concrete to cure for 24-48 hours before proceeding. Properly cured footings provide a solid foundation, preventing structural issues and ensuring long-term durability for your carport.
Framing
Framing involves assembling the structural components of the carport. Erect posts, install beams, and secure them with brackets. Ensure all connections are tight and level for stability.
5.1 Erecting Posts and Beams
Erecting posts and beams is a critical step in framing your carport. Begin by positioning the vertical posts in the pre-poured concrete footings, ensuring they are level and aligned properly. Once the posts are secure, attach the horizontal beams between them. These beams will serve as the base for the roof structure. Use post-to-beam brackets to create a sturdy connection, tightening all bolts firmly. Double-check the alignment and levelness to ensure the frame is stable and even. Properly erected posts and beams provide the foundational support needed for the rest of the carport structure, ensuring durability and safety. Always follow manufacturer instructions for specific hardware requirements.
5.2 Attaching Rafters and Support Beams
After erecting the posts and beams, the next step is to attach the rafters and support beams. Begin by determining the spacing of the rafters, typically 16 to 24 inches apart, depending on the roof design. Secure each rafter to the top of the beams using screws or nails, ensuring they are evenly spaced and aligned. Install additional support beams between the rafters for added stability, especially if using a gabled or sloped roof design. Use steel brackets or screws to attach these beams firmly. Finally, double-check all connections to ensure the structure is sturdy and level. Properly attached rafters and support beams will provide a solid base for the roofing material and ensure the carport’s structural integrity.
Roofing
Choose durable materials like metal or asphalt for your carport roof. Install panels securely, ensuring a watertight seal. Proper installation guarantees weather protection and structural longevity.
6.1 Choosing the Right Roofing Material
Selecting the appropriate roofing material for your carport is crucial for durability and aesthetics. Metal roofing is a popular choice due to its strength, low maintenance, and resistance to weather conditions. Asphalt shingles offer affordability and versatility, blending well with existing house designs. Another option is corrugated PVC, which is lightweight and easy to install. Consider factors like climate, budget, and desired appearance when making your decision. Ensure the material aligns with local building codes and can withstand regional weather patterns, such as heavy rain or snow. Proper selection guarantees a long-lasting and visually appealing roof for your carport.
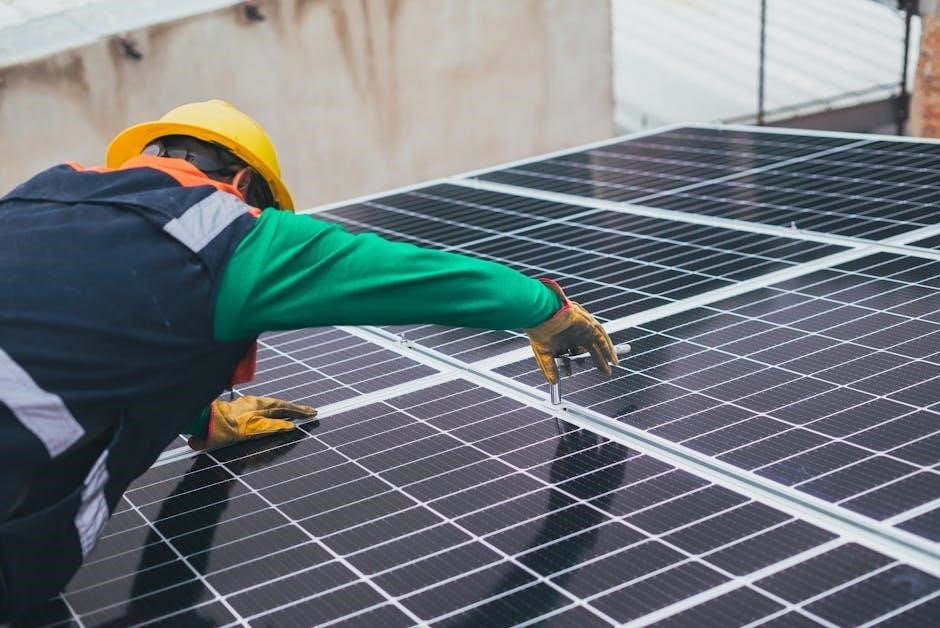
6.2 Installing Roofing Panels and Flashing
Installing roofing panels and flashing is a critical step in ensuring your carport is weatherproof and durable. Begin by carefully measuring and cutting the panels to fit your carport’s frame. Secure the panels using appropriate fasteners, ensuring they are tightly fitted to prevent gaps.Overlap panels slightly at the seams for added protection. Next, install flashing around edges, valleys, and vents to direct water away from the structure. Use weatherproof sealants to ensure all connections are watertight. Work methodically, starting from the bottom and moving upwards to maintain water runoff efficiency. Double-check all fasteners and seals to ensure they are secure and properly aligned. This step requires precision to guarantee a leak-free and long-lasting roof for your carport.
Finishing Touches
Add siding and trim for a polished look, then install gutters and downspouts to manage water runoff, ensuring your carport is both attractive and functional.
7.1 Adding Siding and Trim
Adding siding and trim enhances the carport’s appearance and protects it from weather damage. Choose siding materials like vinyl, metal, or wood that match your home’s style. Install siding panels securely to the frame, ensuring proper alignment and spacing. Use screws or nails appropriate for the material. Trim is then added around edges, corners, and joints to cover gaps and create a polished look. Use weather-resistant materials for trim, such as PVC or treated wood, to prevent rot and insect damage. Secure trim with nails or adhesive. Properly sealing all seams and edges ensures long-term durability. This step not only improves aesthetics but also adds protection, making your carport more functional and visually appealing while increasing property value.
7.2 Installing Gutters and Downspouts
Installing gutters and downspouts is essential for managing water runoff from the carport roof, preventing erosion and damage to the surrounding area. Begin by measuring and cutting gutter sections to fit the length of the carport. Attach gutters to the fascia board using brackets, ensuring they are level and securely fastened. Next, install downspouts at each corner or spaced evenly, depending on the roof size. Connect the downspouts to the gutters and direct them away from the foundation. Seal all joints and elbows with gutter sealant to prevent leaks. Finally, test the system by flushing water through it to ensure proper flow. Regular maintenance, such as cleaning debris, will keep the gutters functioning effectively and protect your carport and yard from water damage.
Doors and Windows
Doors and windows enhance functionality and aesthetics, providing shelter and natural light. They can be customized to match your carport’s design, ensuring durability and style for years.
8;1 Options for Carport Doors
Carport doors come in various styles to suit different needs and preferences. Swing doors are traditional and easy to install, while sliding doors save space and offer smooth operation. Overhead doors provide maximum accessibility and are ideal for larger vehicles. Material options include metal, wood, and vinyl, each offering unique benefits like durability, aesthetics, or low maintenance. Automated doors add convenience, especially for those seeking modern functionality. Consider factors like weather resistance, security, and energy efficiency when selecting doors. Custom designs can also be tailored to match your carport’s architectural style, ensuring a seamless and attractive addition to your property; Proper installation ensures long-term performance and reliability.
8.2 Installing Windows for Natural Light
Installing windows in your carport enhances natural lighting and improves aesthetics. Vinyl, wood, and aluminum windows are popular choices, offering durability and energy efficiency. Position larger windows higher for ample light and smaller ones lower for ventilation. Ensure proper sealing to prevent leaks and use tempered glass for safety. Frame windows with weather-resistant materials to maintain structural integrity. Adding windows not only brightens the space but also increases airflow, creating a more welcoming environment. This feature is especially beneficial for carports used as workshops or storage areas, making tasks easier and the space more functional. Proper installation ensures long-lasting performance and visual appeal.

Electrical and Plumbing
For carports requiring electricity or water, hire licensed professionals to install outlets and plumbing fixtures. Ensure all work meets local building codes and safety standards for reliability and compliance.
9.1 Running Electricity to the Carport
Running electricity to your carport requires careful planning and professional expertise. Start by assessing your power needs, such as lighting, outlets, or electrical devices. Hire a licensed electrician to ensure compliance with local building codes and safety standards. The process involves burying underground cables or installing overhead lines, depending on your setup. Use weather-resistant materials to protect against outdoor conditions. Ensure the electrical panel in your home can handle the additional load. Proper grounding and insulation are crucial to prevent hazards. Finally, inspect the installation to guarantee everything functions safely and efficiently, providing reliable power to your carport for years to come.
9.2 Adding Plumbing for Outdoor Fixtures
Adding plumbing to your carport can enhance its functionality, especially if you plan to install outdoor fixtures like a sink or hose bib. Start by planning the layout and determining the water supply source. Hire a licensed plumber to ensure compliance with local plumbing codes. Use durable, weather-resistant materials like PVC or copper pipes to withstand outdoor conditions. Properly insulate and protect pipes from freezing temperatures. Ensure the drainage system is connected to your home’s sewer or septic system. Test the installation thoroughly to check for leaks or issues. Regular maintenance is essential to prevent corrosion and blockages, ensuring your outdoor plumbing system remains efficient and reliable over time.
Safety Considerations
Ensure proper safety gear like hard hats and safety glasses are worn. Use tools correctly, check for overhead power lines, and ensure structural stability before adding materials. Always follow local building codes and have a helper for complex tasks to avoid accidents and ensure a secure installation process.
10.1 Best Practices for Safe Installation
Adhering to safety guidelines is crucial during carport installation to prevent injuries and ensure structural integrity. Always wear protective gear, including gloves, safety glasses, and a hard hat. Properly inspect all tools and equipment before use to avoid malfunctions. Ensure the work area is clear of debris and tripping hazards, and have a spotter for lifting heavy materials. Check for overhead power lines and maintain a safe distance to prevent electrical accidents. Follow manufacturer instructions for all materials and tools, and consult professionals if unsure about any step. Regularly inspect the structure during assembly to ensure stability and make adjustments as needed. Prioritizing safety not only protects you but also guarantees a durable and secure carport for years to come.
10.2 Potential Hazards and How to Avoid Them
During carport installation, several potential hazards can arise if proper precautions are not taken. Structural instability is a major concern, as improperly secured beams or posts can collapse, causing injury or damage. To avoid this, ensure all components are tightly fastened and regularly inspect the structure during assembly. Power tools pose another risk; always follow safety guidelines and keep loose clothing tied back. Environmental factors, such as uneven ground or strong winds, can also complicate the process. Use leveling tools to stabilize the site and avoid working in extreme weather conditions. Additionally, keep children and pets away from the work area and store tools securely. By addressing these risks proactively, you can ensure a safe and successful installation process.
Maintenance and Repairs
Regular inspections and cleaning ensure longevity. Check for damage, clear debris, and address leaks promptly. Replace worn or damaged panels to maintain structural integrity and safety.
11.1 Regular Maintenance Tasks
Regular maintenance is crucial to extend the life of your carport. Start by inspecting the structure for any signs of damage, such as rust, dents, or rot. Clean debris like leaves and dirt from the roof to ensure proper water flow and prevent weight buildup. Check gutters and downspouts for blockages to maintain drainage efficiency. Tighten any loose screws or bolts to secure the framing. Apply a fresh coat of paint or sealant if necessary to protect against weathering. Finally, trim nearby vegetation to avoid overgrowth interfering with the structure. By following these tasks, you can keep your carport in excellent condition year-round.
11.2 Common Repairs and How to Handle Them
Common carport repairs include addressing rust, roof leaks, and loose framing. For rust, sand affected areas and apply a rust-inhibiting coating. Roof leaks can often be fixed by sealing gaps or replacing damaged panels. Loose framing should be tightened immediately to prevent structural instability. If posts shift, re-level and re-anchor them securely. For foundation cracks, fill them with concrete sealant and allow proper drying time. Regularly inspect and replace worn-out fasteners to maintain integrity. Addressing these issues promptly prevents minor problems from escalating into major repairs. Always follow safety guidelines when performing repairs, and consult a professional if unsure about any step.